Researching another piece I’ve been writing, I realized that I was grossly unfamiliar with a portion of the cPanel & WHM product. For a bit of background, I’ve been using cPanel & WHM for about nine years now, mostly from the end user and system administrator perspectives. Admittedly, I am not a developer, nor do I pretend to be one. Between you and me, I have immense respect for developers and the dark arts magic that they possess to make their tools and applications come to life.
Now, I will jump at the chance to learn something that I don’t have any knowledge of, which led to my research on the development tools that cPanel offers. While building applications is a topic for another day (let’s be honest, I have a LOT of homework to do before scratching that surface), we can move a little further on in the process and explain how to upload and deploy already existing applications. With the help of a fellow cPaneler, I got a crash course journey in application management and deployment. For those unfamiliar with the process, I’d like to share the knowledge!
Getting Started
Contents
The best place to start any journey is the beginning, and at the beginning of every journey, you’re going to need supplies. For the sake of this blog, we’re going to assume you already have an application or a Github repository that you want to deploy as an application on your server (as I do!) and that you have root or reseller-level WHM access to your server. While we have those things, we have a little more preparation to do before we get started.
First Things First
Before we can even plan on deploying an application, we need to make sure our server is up to snuff and has all of the necessary tools to get the job done. For those with some CLI experience, this is a relatively painless experience. If you’re inexperienced, fear not, for I have some instructions to help you out.
1.) Make sure you have the Application Manager feature enabled in WHM >> Home >> Packages >> Feature Manager. Then, you’ll want to make sure the Feature List your account is using has Application Manager enabled (If you do not have WHM level access, you will want to reach out to your hosting service provider to enable Application Manager):
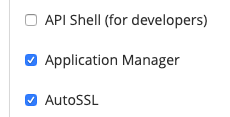
Make sure that checkbox is ticked! Now that the easy part is done let’s get the heavy lifting out of the way.
2.) Disclaimer:the next steps in this process can be done in the WHM user interface at Home >> Software >> EasyApache 4, but for the purposes of this blog, I opted to go the API route in order to learn a new process. Are you unfamiliar with APIs? So was I! For this blog, I decided to use an API-based method for the rest of the Application setup in order to become more comfortable with the API tools at our disposal. If you’re a bit more familiar than I am with using API functions, I recommend giving our UAPI documentation a look to familiarize yourself with the functions available. Stay tuned for more API related blogs coming soon! In the meantime, I recommend using the method that you are most comfortable with.
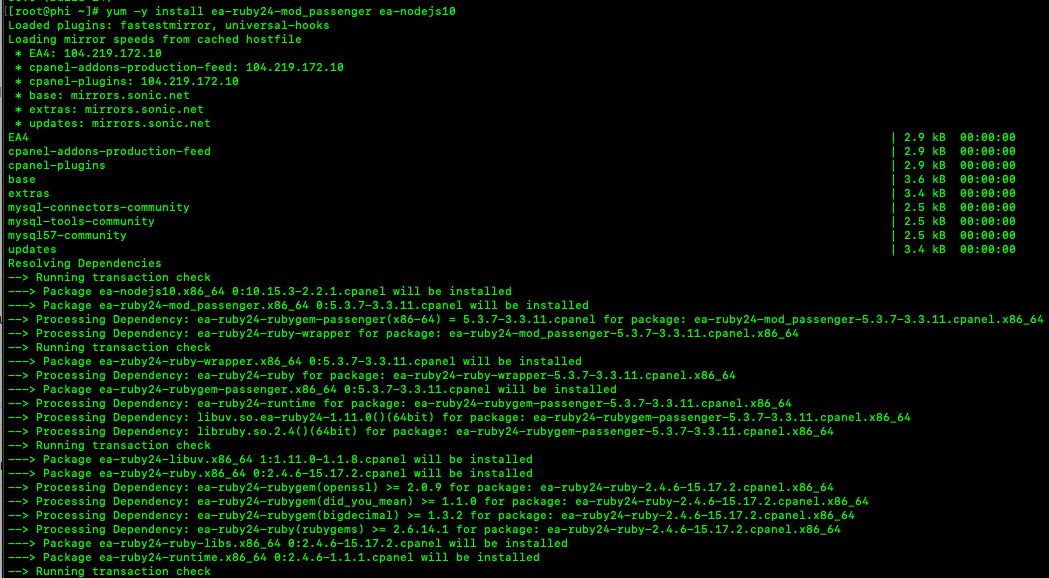
If you don’t immediately see the Application Manager in cPanel (cPanel >> Home >> Software >> Application Manager) you’re going to need to make sure a few Apache modules are installed on your server: ea-ruby24-mod_passenger, ea-apache24-mod_env, and ea-nodejs10 if you want to register a Node.js application (as we do in my example). These modules can be installed via CLI (command line interface) very quickly using the following commands:
yum -y install <name of the module>
The output will look something like this (this is only a snippet of the output, and includes installing two modules at the same time, so your results may vary)
I Think I’m a Clone Now
3.) Next, you’ll want to set up your application for use. If you want to try this yourself as practice, I suggest following what I did, which was to clone a Github repo of the Phusion Passenger NodeJS Connect demo. Here are the steps (note: you’ll want to change the variables for the user and file pathways to your users and paths, otherwise these API calls will not work properly):
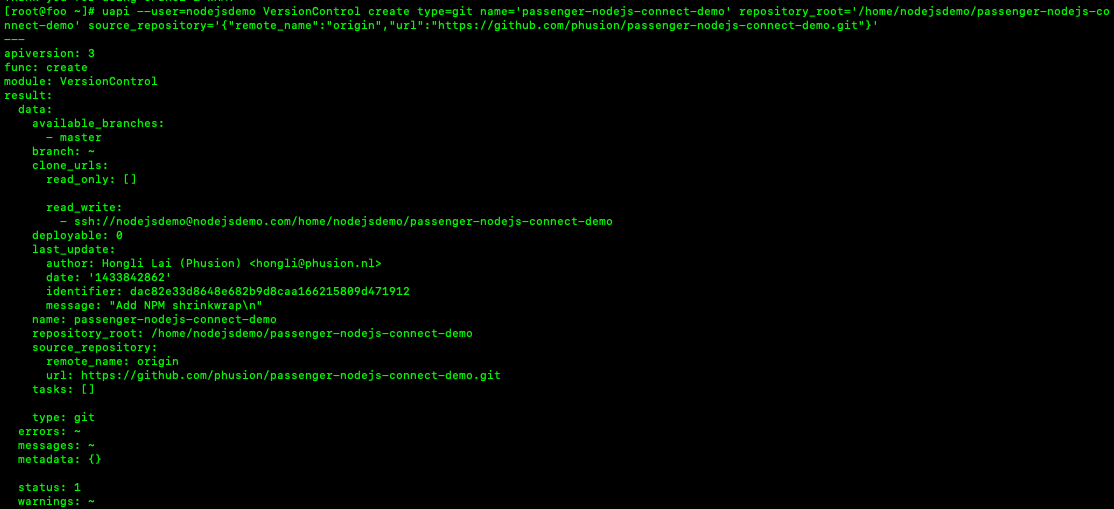
This API call identifies the user (in this case, nodejsdemo), creates a clone of the Git repository (passenger-nodejs-connect-demo), creates a home for the repository, and pulls from the repository source (the github.com link).
uapi --user=nodejsdemo VersionControl create type=git name='passenger-nodejs-connect-demo' repository_root='/home/nodejsdemo/passenger-nodejs-connect-demo' source_repository='{"remote_name":"origin","url":"https://github.com/phusion/passenger-nodejs-connect-demo.git"}'
Your output should look something like this:
3.) Now, let’s register the application with the cPanel Application Manager. I again used an API call to do the heavy lifting:
uapi --user=nodejsdemo PassengerApps register_application name='passenger-nodejs-connect-demo' path='/home/nodejsdemo/passenger-nodejs-connect-demo' domain='nodejsdemo.com' deployment_mode='production' enabled='1'
If you’re not comfortable using API calls, you can always use the cPanel user interface to do this portion:
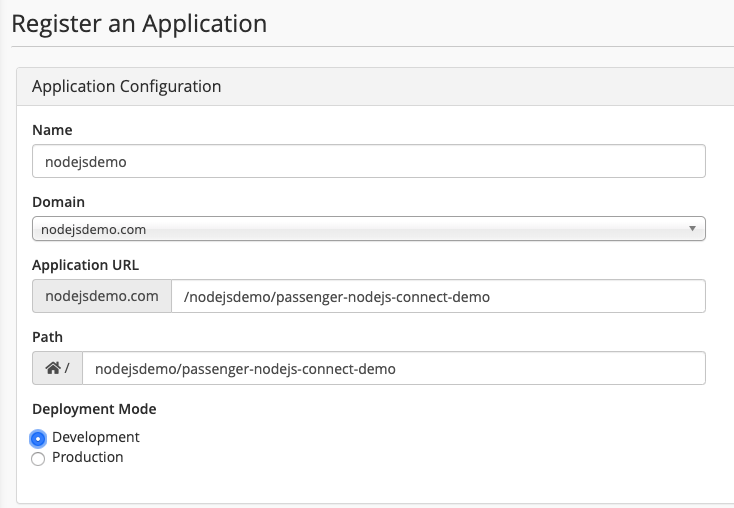
4.) Next, I needed to ensure the application’s dependencies, again using an API call:
uapi --user=nodejsdemo PassengerApps ensure_deps type='npm' app_path='passenger-nodejs-connect-demo'
My results looked like this:

5.) And the final step- set proper permissions! For this app to work properly, you’ll want the permissions set to 711.

Let’s Fire it Up!
Now that we have the Application deployed, registered, and with the proper permissions, let’s navigate over to its location (the file path I specified when cloning the Git repo) and see how it works!

We Built this App on Rock and Roll
Not bad for a first try! While this is baby steps in terms of writing and managing your applications, it’s a tiptoe into a much bigger pool. Hopefully, you, the reader, learned as much as I did through this process! If you want to discuss app deployment, using cPanel App Manager, my bad puns and more, please join us in our Slack and Discord channels, or on our official cPanel Subreddit!

